Kylie Seidner (She/Her)

Hello, I’m Kylie Seidner! I am currently working as an anatomy demonstrator at the University of Glasgow with the aim to become a forensic pathologist. My background is a BSc (Hons) Biomedical Science and my love of combining art with science lead me to pursue this MSc in Medical Visualisation and Human Anatomy. My thesis focused on creating an augmented reality application on android devices to provide a new way to help students grasp the difficult concepts in dissection guides provided from the Royal College of Pathologists. I believe that every student deserves to learn in the way that best suits them and for some of us that means having a visual representation of what is being presented. I hope to bring my new digital illustration and 3D modelling skills, which I’ve learned throughout this course, with me into the medical community and to continue furthering my knowledge and passion for anatomy and education.
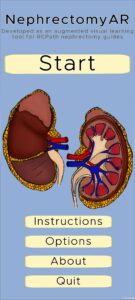
NephrectomyAR
Using Augmented Reality to Enhance Biomedical Pathology Dissection Guides
In recent years, researchers have begun to explore extended reality’s use in education. Several universities have implemented visualization tablets and virtual reality applications to learn about human anatomy. Researchers have found that extended reality has a greater impact on spatial learning than traditional 2D textbooks and videos. Although there is plenty of research for this is medical education, there is a distinct lack of high-quality research regarding Augmented Reality for teaching biomedical and pathology technician students. After researching recent developments into augmenting textbooks to incorporate extended reality, I utilized this approach to develop an application to augment the Royal College of Pathologist dissection guide on nephrectomies.
A series of 3D kidney models which were segmented in 3D Slicer from a computerized tomography (CT) scan were then imported into 3DS Max and ZBrush for retopology, texturing, and animation. The application utilized augmented reality with image targets and a series of model controls which allowed the user to animate the models and provide information in a clear, intuitive format for amateurs following along the dissection guide. Following the application development, user testing was performed, utilizing a standardized survey called the System Usability Scale. This provided valuable user insight and feedback into the application which demonstrated that the application was fully functional and easy to use for a novice. Further testing with working biomedical scientists would provide even more insight into the future of this app.


Volumetric Visualisation
The process of creating 3-dimensional (3D) renders from traditional 2-dimensional (2D) data sets such as CT and MRI scans is called Volumetric Visualisation. During this module I aligned several datasets and segmented different pathologies were seen in a variety of data sets. I was able to produce several high quality pieces of work utilising direct and indirect rendering techniques to show the volume, location, size and density of different tumours and bone fractures. This module was challenging but I thoroughly enjoyed it. This enjoyment was demonstrated in my final project which received full marks (100%) and I ended up utilising these skills for my thesis to create NephrectomyAR, my augmented reality dissection guide application.


Indirect Render of Brain Tumour

Direct and Indirect Volume of a Tooth

Lung Tumour Segmentation
Know Your Boobs!
‘Know Your Boobs’ is an educational game designed and developed in collaboration with my peer, Athena Ling. The game design is aimed for women aged 16+ to help them understand their anatomy and know some of the early symptoms of breast cancer. Breast cancer is is the most common cancer diagnosis in the UK and early detection is key to the best health outcomes.
I was in charge of the main storyboard concept drawings and modelling the 3D interactive breast anatomy to teach users the healthy and cancerous appearance of breast tissue. I created the internal anatomy of the healthy and cancerous breasts and heavily modified an external chest asset we purchased to reflect the external symptoms of cancer. Hyperrealism was not my focus while creating the anatomy models. This was because the aim was to educate people with little to no anatomy knowledge and hyperrealism may have deterred people from wanting to learn about such a sensitive topic. Each model represents a real structure and a stylised texture and art style still allows the viewer to learn the anatomy without the fear of seeing real macroscopic anatomy. I also created all the UI function and appearance of any sprites and 2D assets used for button navigation and instruction panels throughout the application.
The challenge of this game was creating a space that the user felt safe while still learning the importance of understanding their anatomy. To do this we made the color scheme reflect a calm and safe atmosphere while keeping our main color pink for breast cancer awareness. Sound was one of the most challenging aspects of the game because of the seriousness of the topic. We managed to source a calming and relaxing backing track that didn’t disrupt the educational aspect of the game while providing a volume controller to give the user the ability to control the volume. Some simple sound effects for the quiz section were also added but careful consideration was given to these sounds to not sound overly jarring or incredibly happy to maintain the overall aim of our game.
The skin of the chest can be made transparent to better view the internal anatomical structures rather than just the external appearance to learn the name and function of each structure. Alongside the learning feature of the application, a quiz style game was also included to help the user retention and engagement to learn healthy anatomy and understand the main symptoms of cancer.


Final Textured Breast Models


Comparison Scene- Cancerous Side
3D Arm Model
Prior to this degree, I had never made 3D models. One of my first deadlines was to create a model of an arm based off one image we were given, retopologize one vertebra by hand and one by automatic modifiers, create a 30 second animation, and one high quality still image. I took all the skills I learned over the first several weeks of this course to create my first ever complete anatomical model.
To begin, I gathered a variety of images to give different perspectives for each muscle in the arm. This allowed me to more accurately model the shape and size of the muscles relative to the rest. I then utilized some texture maps given to me by my lecturer as well as creating my own textures to apply to each muscle and tendon. Retopology on the vertebrae was the next challenge. One vertebra was retopolgized using a modifier in 3ds Max and the other was manually retopologized by created a new low poly model. Once everything was textured I created a background scene in a museum style layout with lighting and cameras which were used to create and render a 30 second animation.
Looking back at this project in the final month of this degree, having improved my skills, I can see many modifications that I would now make to create a much more realistic and organic model. However, for being my first ever organic, anatomical, 3d model this was quite an accomplishment and deserved to be shown in my showcase.


